16/9/2018: If a deal comes along there are several reasons to say NO, sadly I did not listen…..
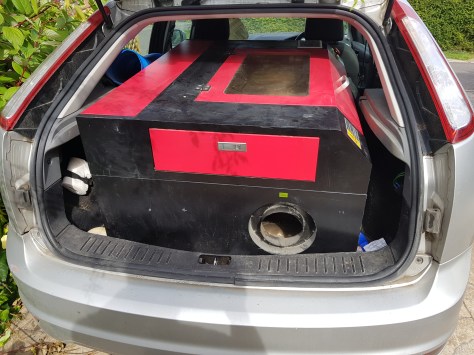
The opportunity to get a Laser Cutter has come around and at the cost I found it hard to say no, in fact I didn’t so as I write this now it is sitting in the car waiting for some extra volunteering hands to help me get it out.
It came from near Leeds which is a long way North of where I call home. The 500 mile round trip took a wee while but was completed on a cup of coffee and a burger which I was pleased about.
The AD looked like this:


A deal was struck as there were a few extra problems which raised their head after the advert was placed making the original byasking price unrealistic but a deal and yet another project – who could say no!
After some measuring on the phone the end result looked like this
In theory all I have to do now is fix the Z height adjustment belt, find and fit a couple of new lid gas struts, fix (replace) the smashed limit sensor on one axis and find out why it reputedly has little or no power. It’s a great opportunity to learn about laser cutters as at the moment I know almost nothing!
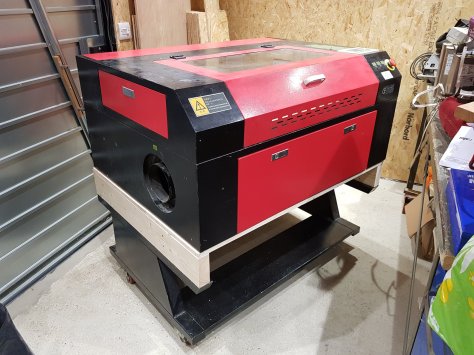
26/9/2018: Well, I have had a look around it and a little play. The first thing I did on removing it from the car was build a spacer to lift it up a bit. I read this somewhere and so far I have not regretted doing it. It looks like this now
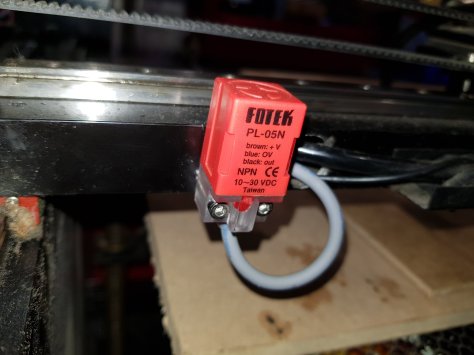
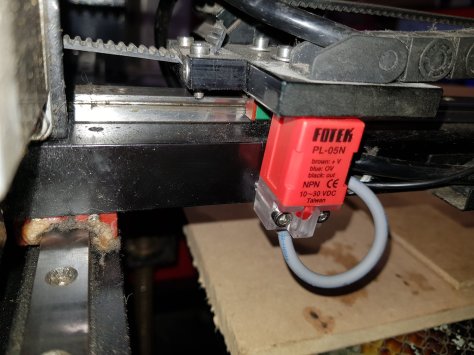
On turning it on the cross axis would try to home and end up clonking dreadfully as the limit switch was broken. I knew about this but wanted to see if I could try to fire the laser but I failed. Very soon though a new hall effect limit switch arrived and was fitted. The original and the new one looked like this
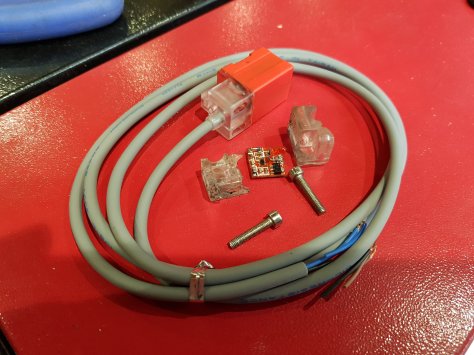
It was tricky to fit because the original Chinese fitter was a bit random when he drilled and tapped the mounting holes (there were 3) and they did not line up. Some elongation of the sensor mounting slots sorted that though.
Anyway, after making sure nothing hit I fired it up again and this time was able to get to the main screen and try the pulse function. It works – just not very well. It took about 1 second to burn a hole through hardboard. This seems rather whimpy to me although I am no expert. Again though, the seller had primed me and this was not a surprise.
I also bought a couple of new lid struts from eBay. I went for 350mm extended and 200N force (the smallest I could find). Bit of a guess really and it turns out just one of these struts works the lid fine. Two makes it an auto opening menace. I would guess 80 to 100N struts would be just fine.
Plans moving forward: Upgrade it to about 90W using a Reci tube and power supply, also keep an eye open for a chiller.
19/10/2018: It has been an eventful few weeks. I have fixed all the known faults as well as worked on the bed levelling which necessitated removing the lead screws from all four corners again. The lock nuts on the cheap and nasty angle brackets needed hitting with a drift in the vice to release them but having done this I can now adjust the levelling fairly easily. Depending on how much I use the z axis and any problems I encounter I may replace the lead screws and/or redesign the brackets, we’ll see.
I finally had my ebay power meter arrive. It took a while but was £25 or so cheaper than Amazon 😁…. When I used it 1/2 inch from the end of the tube I was getting 12w of pure co2 power?! This is a little less than a 60w tube should give but does rather explain the lack of performance.
One new fault that raised its ugly head was an occasional link error as I was trying to move the head to the corners for the bed adjustment. When this happened it then reset and the head homed – not helpful. Anyway, in time honoured fashion I just ignored it but tonight I turned on the machine and nothing…. no screen at all. Nothing like a complete failure to prompt some action and after some investigation it turned out I was a victim of Chinese quality control or lack of it. As can be seen in the photo it was a simple bad connection within the screen csse. A quick strip down, tweak of the locking pin and reassembly and it is now working perfectly.


I have also ordered a water chiller, a new 60w tube (couldn’t afford the 90w upgrade) and some acrylic odds and sods which should be arriving soon. These are UK supplied so expensive but shipping is prompt.
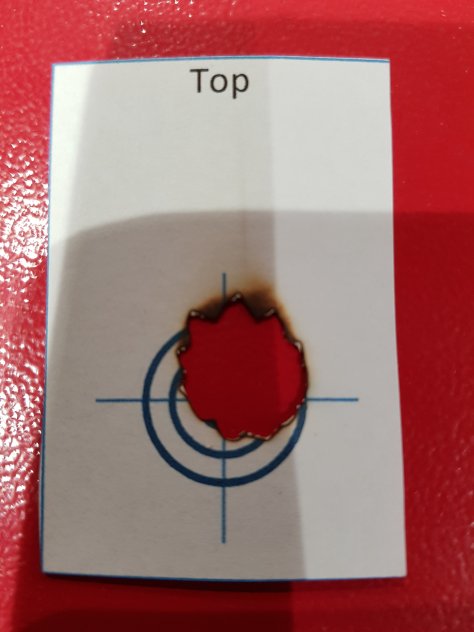
27/10/2018: Today I decided to fire the old tube and check the mirrors after cleaning them. I spent an age designing clip on target holders using Fusion 360 and my 3d printer. I was pretty pleased with the results so I clipped them on, fitted the paper target on the carriage end and pressed ‘pulse’….. I was very surprised to see a hole melting in my air assist pipe about 2 inches from the target. I learnt then that the mirrors don’t go back as they were when you remove them.
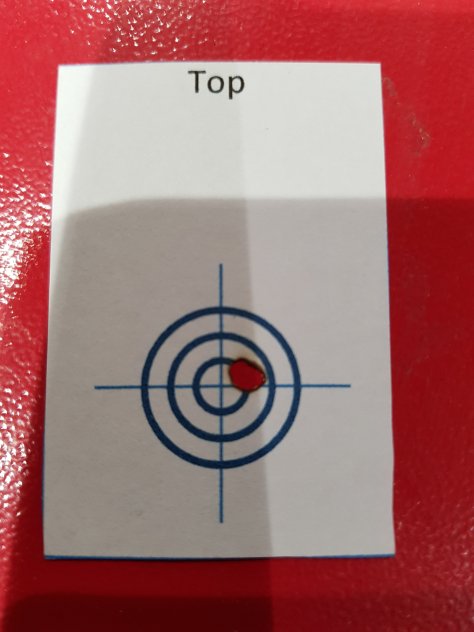
Undeterred I moved my target to the first mirror 2 inches from the tube end. I also placed some board to catch the stray beam and thought to myself, yep, all bases covered, ready to press ‘pulse’ again….. so I did. This time my paper target burst into flames! Damn, should have seen that coming. After blowing out the smouldering flames I then found out that the mount had gone rather soft in the middle, to be expected I guess. A couple more goes and I had it sussed a bit later. These pics are the latter goes, the first one is ash.
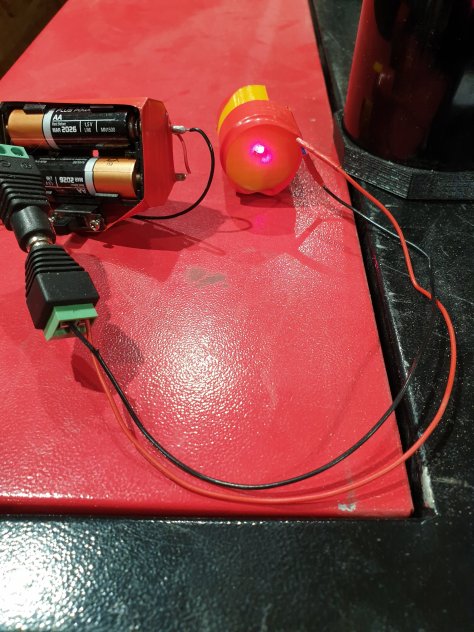
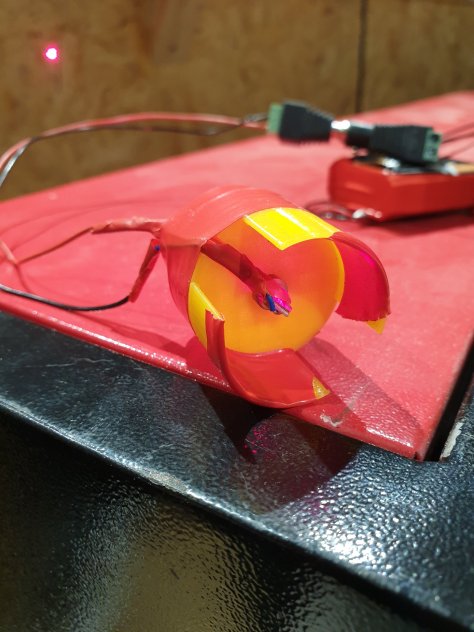
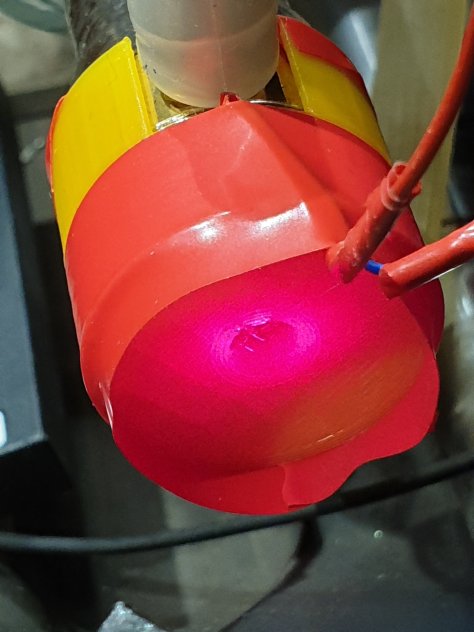
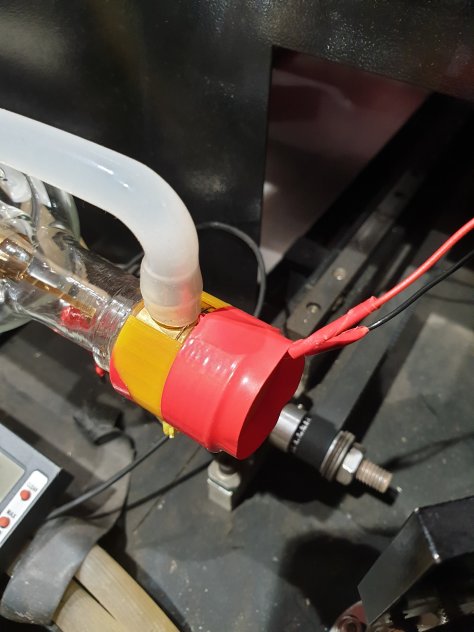
So, what to do? Carry on and probably get them aligned ok or come up with a better plan B. That plan would involve making a mount that ‘clipped’ onto the tube end and housed a cheap 3v red laser. Align this with the beam and future settings should be a breeze. Time to sleep on it I suspect.
6/11/2018: I have finally managed to get all the pieces of the laser puzzle together. There has been all the repairs and replacement parts, the maintenance e.g. mirror alignment and general cleaning and all the logistics around cooling and extraction. I have managed to cut and engrave some plywood but the highlight was a power test. I did this just before the lens and it registered exactly 60w, a massive improvement over the 4w I got on buying the laser. Off to learn some more stuff now 😁
20/11/2018: Just when you think you have dotted all the i’s and crossed all the t’s something bites you in the backside. I decided to build a box to house the new ammeter and all went well except a couple of the tongues didn’t line up. I was able to trim them to fit but this needed resolving. I did another test piece with the same results and no amount of staring at the software yielded a solution. I did another job involving text and this one was weirder still, every now and then there would be a shift in the origin of the x plane – or so it seemed. Occasionally there was also the instance of the fat letters which was even stranger. I replaced the stepper driver without much hope of it fixing the problems and of course I was not disappointed – no change. The next step involved a lot of thinking and not a lot of action. After a week of this I had a eureka moment……. ten minutes later the problem was diagnosed and fixed! The solution was just a washer, the problem was rubbish quality control in China when the unit was made. The focusing lens is held in by a screw thingy and its thread on the outer edge simply missed its mating thread. This meant it was acting as a spacer rather than a clamp. When fitted there was a .1mm clearance meaning the lens could move. As the shuttle changed direction sometimes the lens would move sideways etc. Fit a washer and test it and so far so good.
8/1/2019: It’s been a slow Christmas break but actually rather nice doing very little. I did do some more testing on the laser though and in particular fine tuning the mirror alignment. My main observation was that I improved it by adjusting the angle and height between the tube and the first mirror. I also created a 3D printed laser holder that simply fits over the end of the tube using friction for alignment. This was pretty successful in initial tuning of the mirrors.
Final tuning is still best with the real beam but burning lots of bits of paper was less than efficient. I got around this with some colour changing ‘paint’ (actually a powder) which I mixed with araldite and smeared it on the target paper. Add another target with the rings cut out and hey presto, temperature dependent reusable targets. In these winter months it should work rather well.
More soon
